Most people try to write the password down somewhere or simply check on the router every time they need to give it to someone else. Luckily, if you already have a computer connected to your WiFi network, you can easily view the password there. I’ve already written about how to view WiFi passwords on a Mac and in this article, I’m going to talk about doing the same thing in Windows. Note that the procedure is the same for Windows 7, 8 or 10. Also, be sure to check out the YouTube video we made below, in case you don’t want to read so much text.
View WiFi Password in Windows
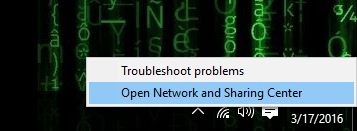
In order to view the WiFi password on your Windows machine, you need to make sure you are already connected to the WiFi network or have previously connected to the WiFi network. If so, then go ahead and right-click on the WiFi icon in the system tray and choose Open Network and Sharing Center.
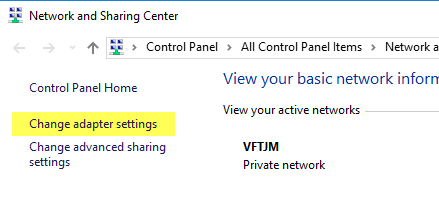
Now go ahead and click on Change Adapter Settings in the left-hand menu. Also, be sure to read my previous post if you want to learn more about the Network and Sharing Center.
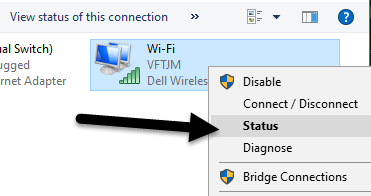
Find the icon for Wi-Fi, right-click on it and choose Status.
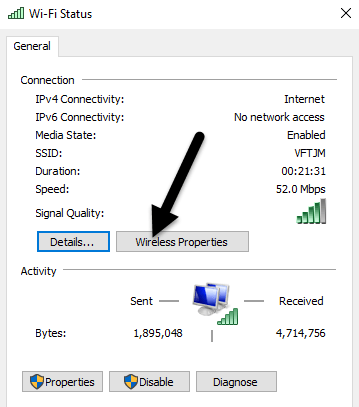
This will bring up the WiFi Status dialog where you can see some basic information about your wireless network connection.
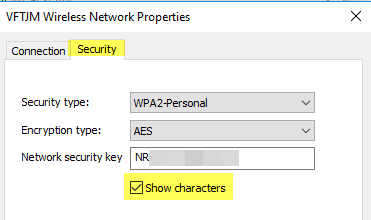
Click on the Wireless Properties button and then click on the Security tab.
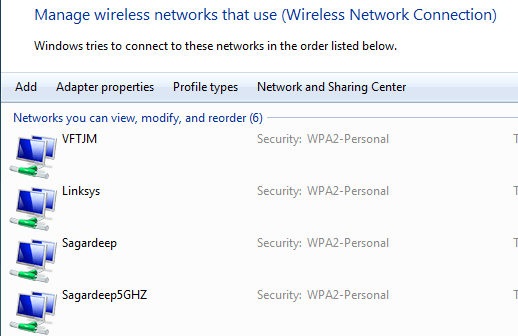
Here you will see a text field called Network security key. Go ahead and check the Show characters box and you’ll now be able to see the WiFi security password. Note that this is just the WiFi password of the currently connected WiFi network. What if you want to see the WiFi passwords for WiFi networks that your computer previously connected to? Luckily, that’s pretty easy too in Windows 7. In Windows 8 and 10, you have to use the command prompt, which is pretty annoying. Anyway, in Windows 7, open the Network and Sharing Center and then click on Manage Wireless Networks.
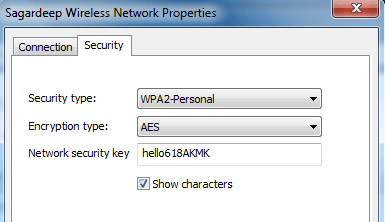
You will now see a nice list of all the wireless networks that computer has ever connected to. Just double-click on the one you are interested in.
Then just click on the Security tab and check the Show characters box again to see the password.
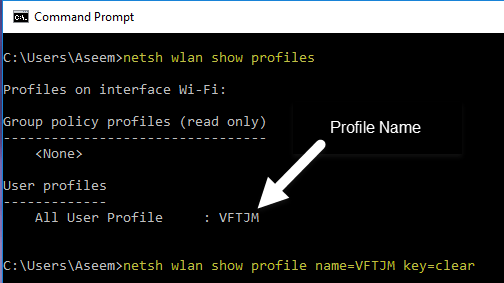
In Windows 8 and 10, you have to open a command prompt by going to Start and typing in CMD. When the command prompt opens, type in the following command:
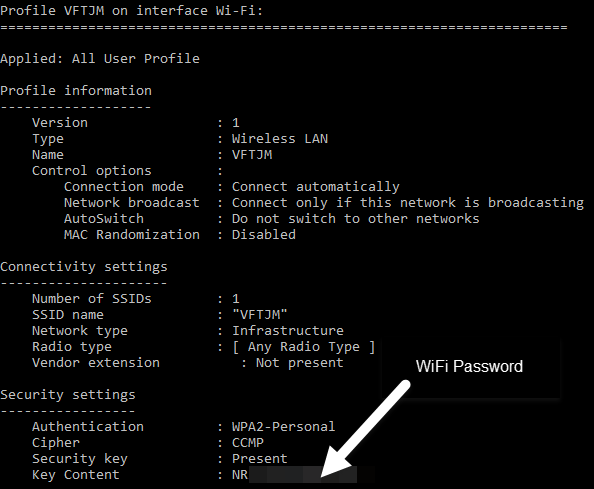
You’ll find all the wireless profiles listed under User Profiles. The name of the WiFi network is on the right. In my case, I only have one WiFi network listed. Now to see the password for a profile, type in the following command: Go ahead and replace profilename with the actual name of the WiFi network listed from the previous command. In my case, the WiFi network is named VFTJM. You do not need to use quotes anywhere in the commands.
When you run the second command, you’ll get a lot of output, but you are only interested in finding the line that starts with Key Content. To the right will be the WiFi password. I’m not sure why Microsoft removed the convenience of seeing all your previously connected WiFi networks in Windows 8 and 10, but thankfully there is still a way to get all of the information. If you have any questions, feel free to comment. Enjoy!

