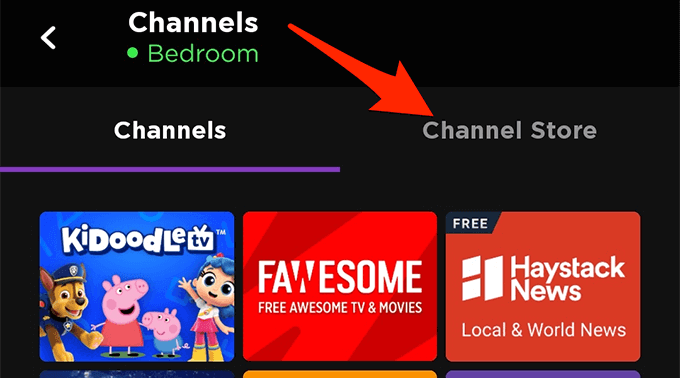
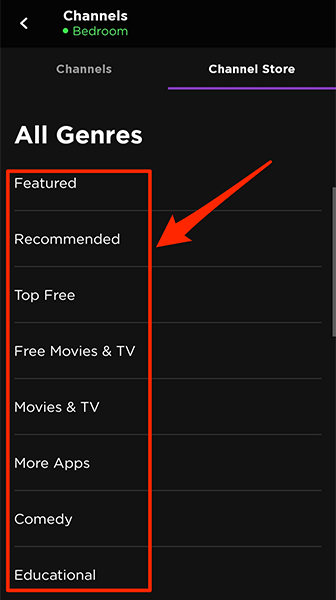
The Roku Channel Store offers plenty of channels to add to your Roku. There are various genres to choose from. You can use your Roku device, the Roku website, or the Roku mobile app to add channels to your device.
Add a Channel to Roku Using the Roku Device Itself
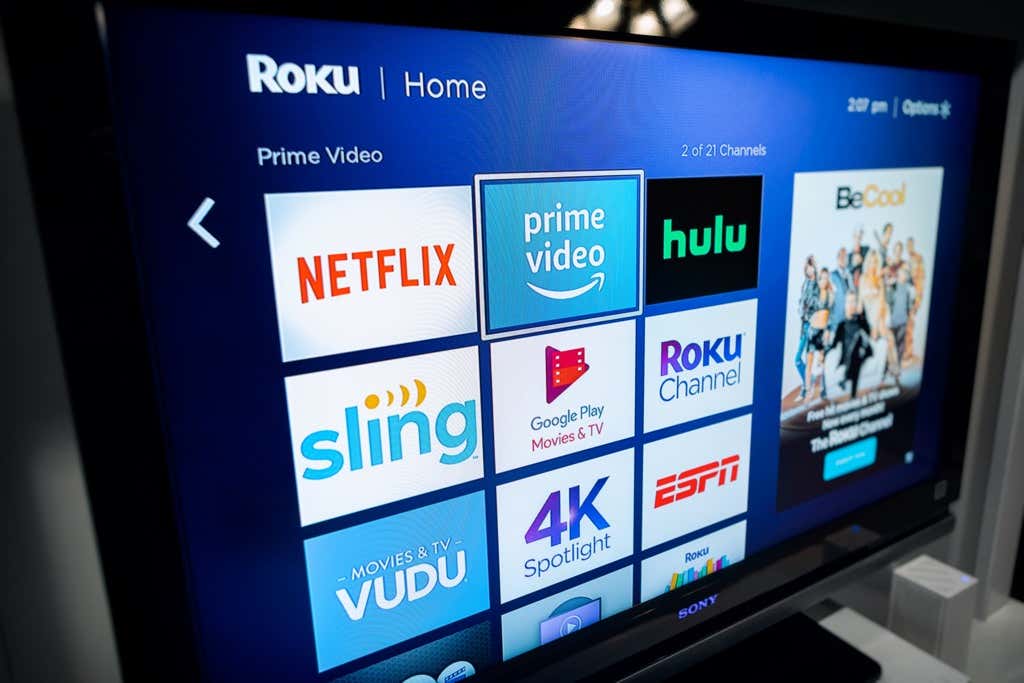
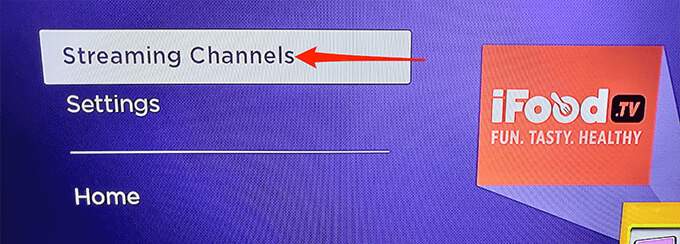
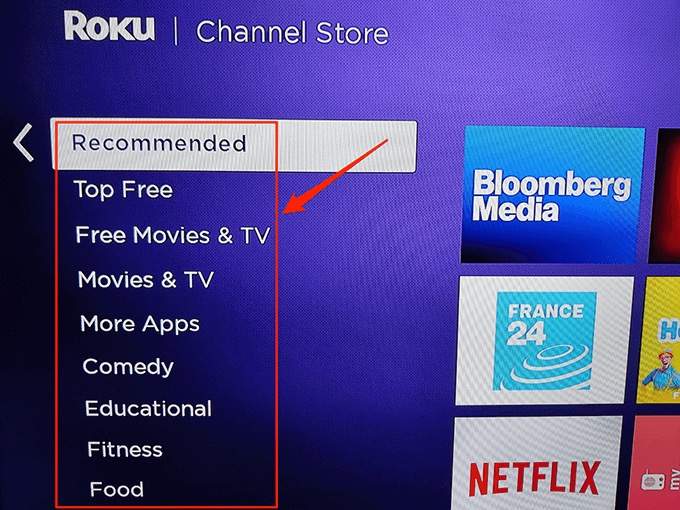
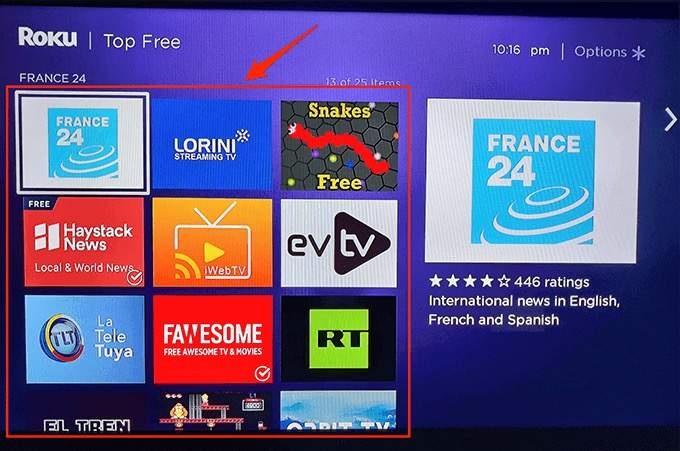
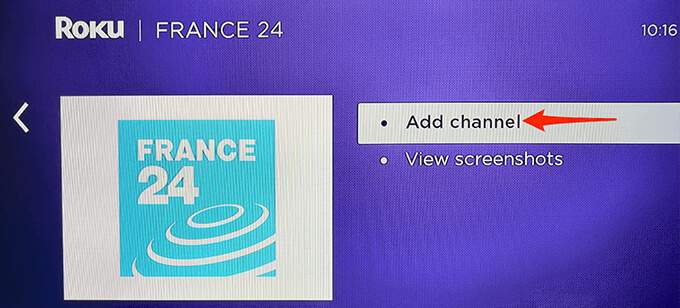
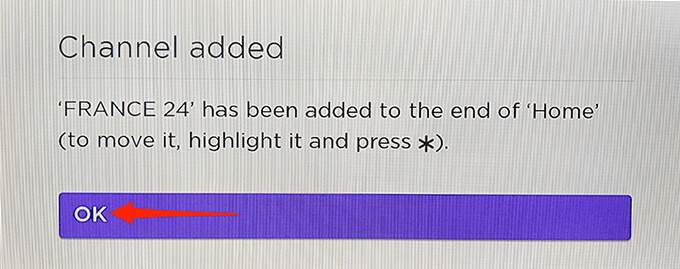
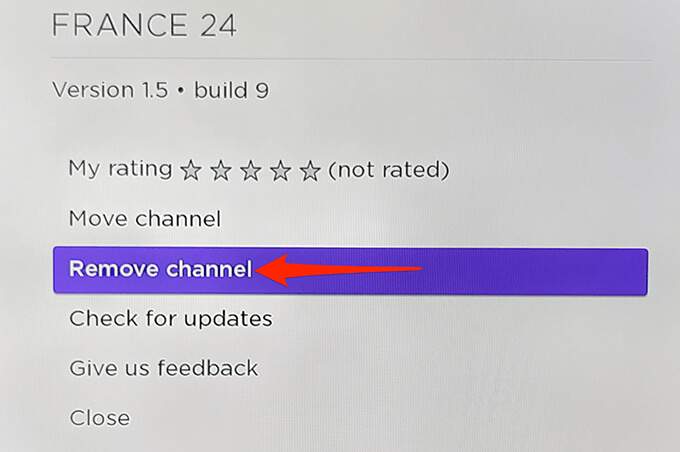
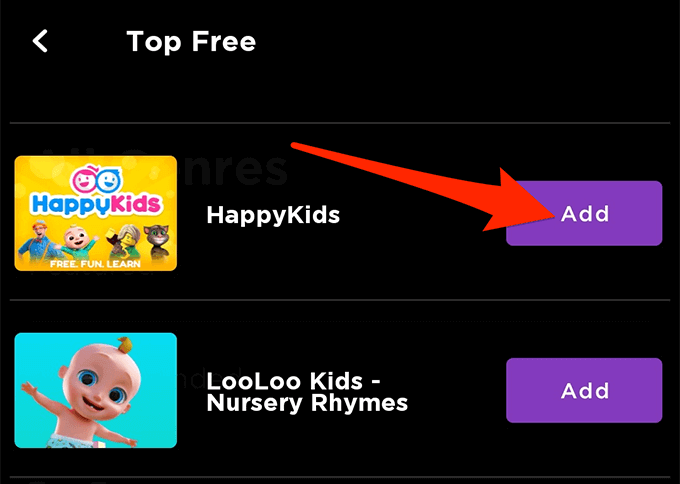
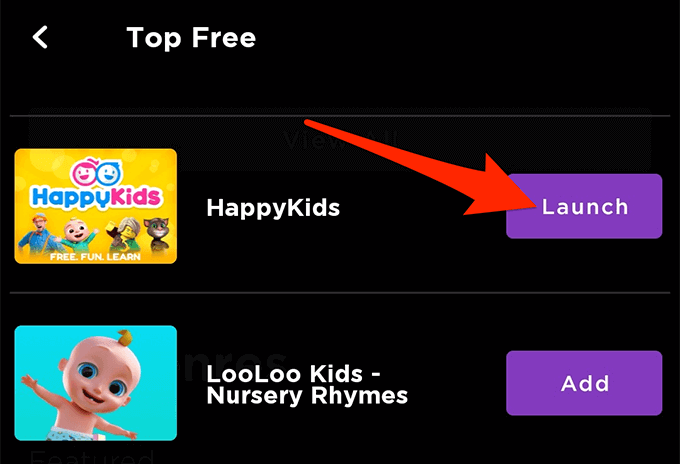
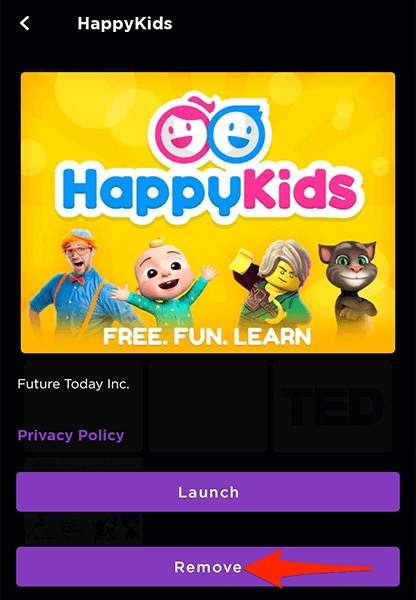
You can use your Roku device itself to get access to various channels. The device gives you access to the Roku Channel Store, which hosts many free and paid channels. You can sort them by multiple categories and add the ones you want. Later, when you want to access the newly added channel, simply access your Roku’s home interface, and you’ll find all your channels there. If you’d like to remove a channel from your Roku, select that channel on Roku’s main interface, press the Star button on your Roku remote, and choose Remove channel from the menu. Confirm your action and Roku will remove the selected channel from your device.
Add a Channel to Roku Using the Roku Website
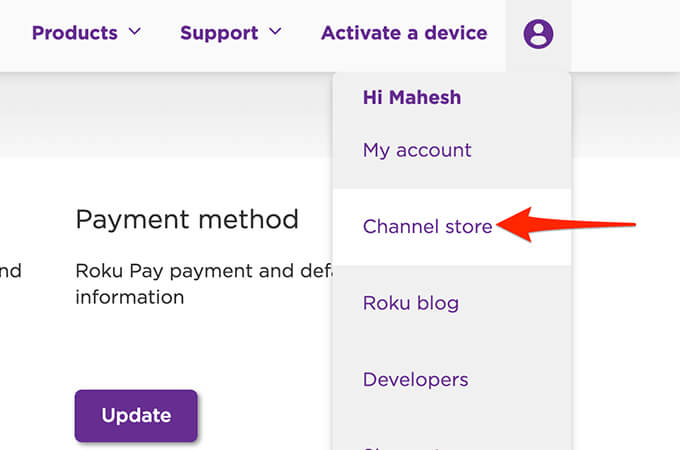
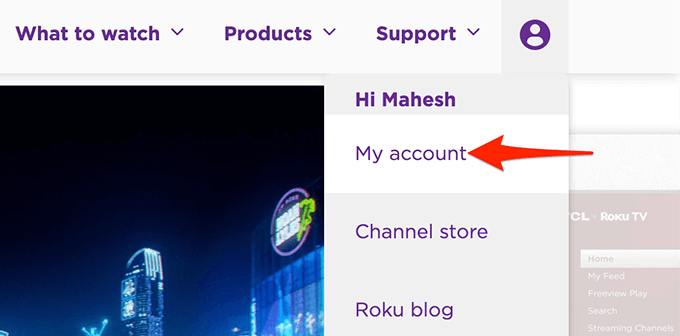
If you’re on a Windows, Mac, Linux, or Chromebook computer, you can use Roku’s official website to add a channel to your Roku device. The Roku site gives you access to the Channel Store that hosts all the channels you can use on your device. This method works by adding a channel from the Roku website, and your Roku device then syncs that information from its servers. As a result, you get access to the channels on your Roku that you added from the Roku website. To remove a channel added with this method, you’ll have to rely on your Roku device or mobile app. This is because the Roku website doesn’t offer the option to remove channels.
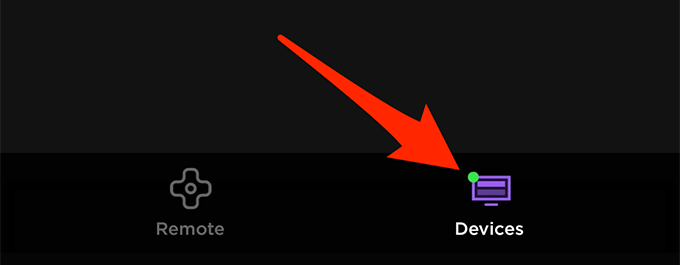
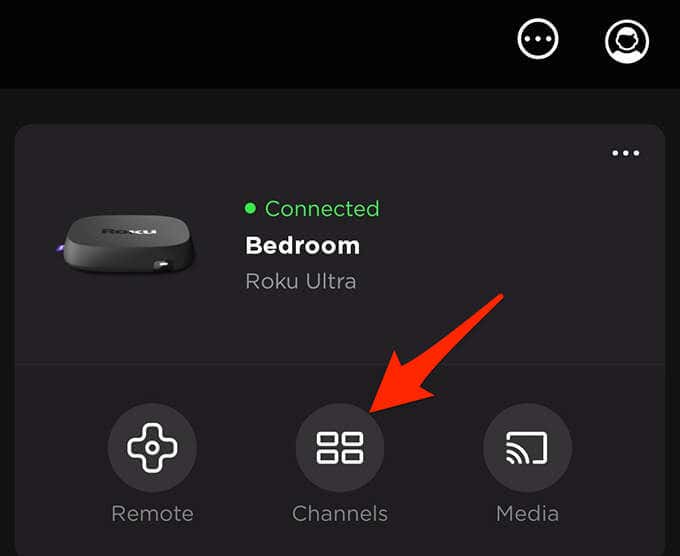
Add a Channel to Roku Using the Roku Mobile App
If you don’t already know, Roku offers a mobile app for both iOS and Android-based devices. You can use this app to perform various tasks on your Roku device, including adding new channels. To remove a channel using the Roku mobile app, open the Channels option in the app. Tap and hold the channel and choose Remove.
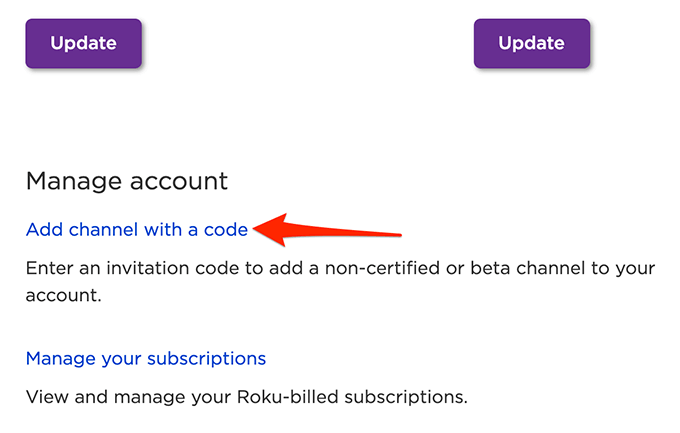
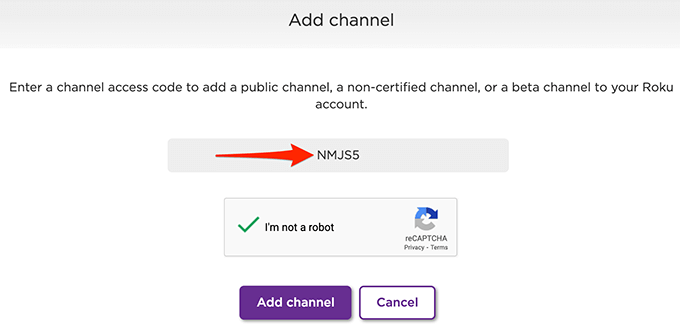
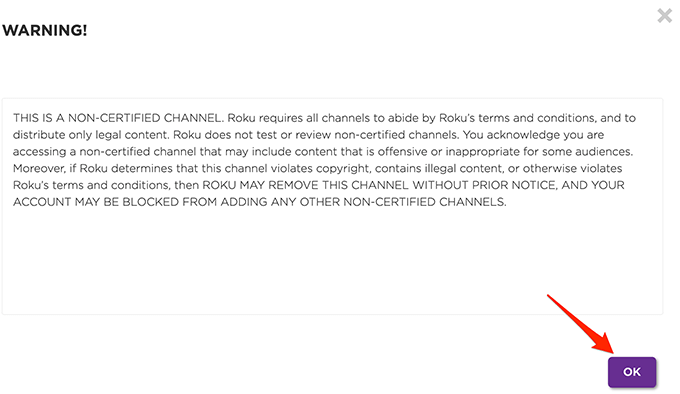
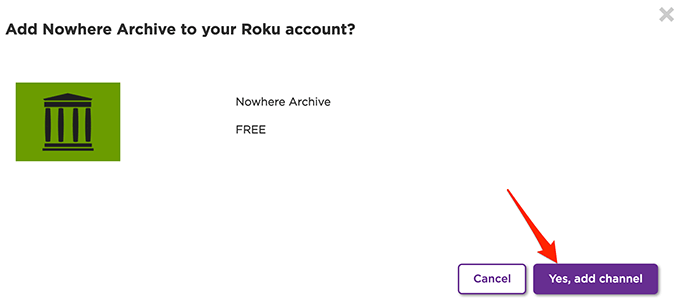
Add a Non-Certified Channel to Roku
The Roku Channel Store has plenty of channel options, but that’s not the only source of channels for your device. There are certain channels classified as non-certified, and these aren’t listed on the Channel Store. To add these non-certified channels to your Roku, you’ll need to use an access code on the Roku website. Each non-certified channel has an access code for it, and you can usually find this on the channel website or the repository where you get the channel data from. Once you have the channel’s access code, follow these steps on a desktop computer to add the non-certified channel to your Roku: You can access these non-certified channels the same way you access the regular channels. The only difference between a regular channel and a non-certified channel is how you add the channel to your Roku device. We hope this guide helps you get your favorite channels on your Roku device. Let us know in the comments below what channels you added to your device.