Using Word’s built in cover page feature, you can add a professional looking cover page to any document. The cover page feature in Word is certainly not going to turn poor writing into a winner. However, using this feature, you can add some flair to your documents to make them stand out and look more like they came from a professional than an amateur. This is particularly important for those running a home office and students, both of whom must often turn over their work for someone else to judge.
Add a Cover Page to a Document
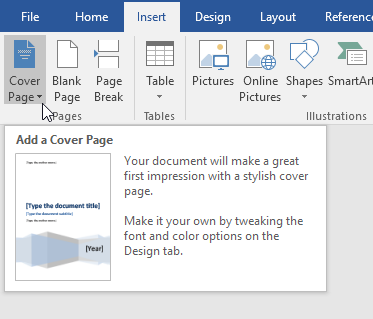
Open up any document in Word and click on the Insert tab on the Ribbon. On the Pages section of the Ribbon on the far left, click on the button labeled Cover Page.
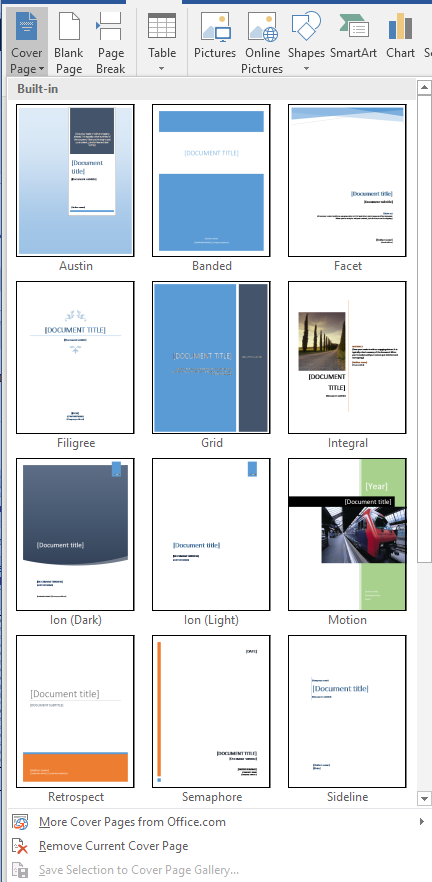
When you click on the button, you’ll notice a few things. First, Word has several cover page templates from which to choose from. Second, this is the menu where you can also remove a cover page from a document. This is an important feature so you don’t have to manually delete the page yourself if you later decide to remove or change the design of the current cover page. Finally, you can also Save Selection to Cover Page Gallery. This is useful if you have created your own cover page and you want to save it as a template for later use. Lastly, you can go to Office.com and find a lot more cover pages if the built-in ones aren’t enough. For now, let’s add a cover page to an existing document.
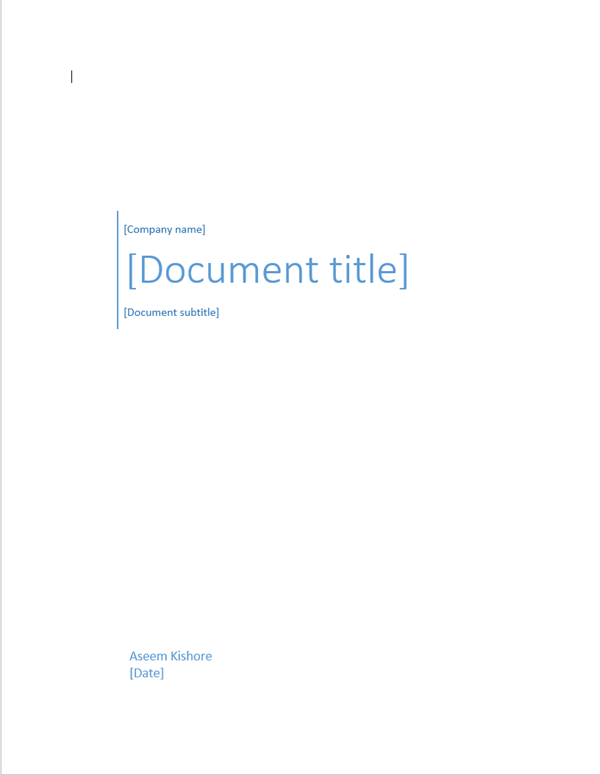
Suppose you have created a document to show some clients and you want to make a professional impression. Certainly, some of the cover pages are more appropriate than others. One cover page suitable for such a document is the one labeled Sideline. This cover page is simple and draws immediate attention to the content of the document. This is also a good choice if you will be printing the document on a monochrome (black and white) printer. Once you select the Sideline cover page, your document should look like the one pictured below.
Once you have chosen the Sideline template, it is time to edit the cover page to indicate the contents of your document. Specifically, you can edit the company name, document title, document subtitle, author, and date fields. When complete, your cover page should look something like the one pictured below.
You may be concerned about adding a page to the beginning of a Word document. However, just like any other page you may add, your page numbers, figure captions, footnotes, headers, footers, and other dynamic content will adjust to accommodate the new page. Once you finish editing the cover page, you can go back to the Cover Page button and select a new template. All of the information you typed in will remain intact so you can change templates on the fly and not lose any of your information. If you later decide that the Grid template is more appropriate for your document, simply click on the Cover Page button on the Ribbon and select the Grid template. Your company name, document title, document subtitle, author, and date fields will carry over to the new template if they exist in the new template.
Using Word’s built in Cover Page feature, you can give a professional appearance to your business, student, or professional document. Just be careful to choose a cover page that matches the occasion. A conservative cover page is always a safe bet for business, but a colorful and cheery cover page can help highlight the mood of the content of your document. Enjoy!


